Tools you will need
Wire cutter and crimper
Phillips screwdriver
Torx driver
Wire tap
2 sided foam tape
Scotch tape
Special needle removal tool (fork)
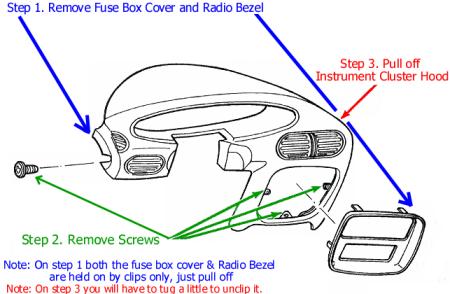
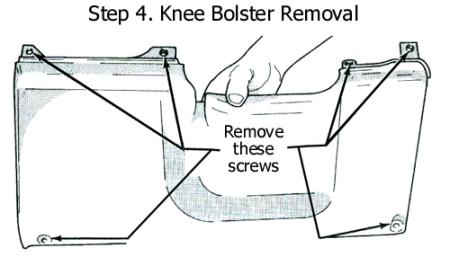
Start by removing the following
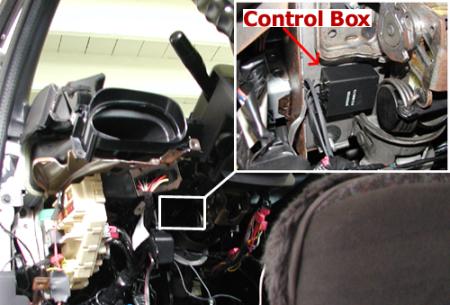
Now you will need to install the Controller Box, Controller, 12V+ wire and
ground wire. I am showing where I installed mine, you may pick different
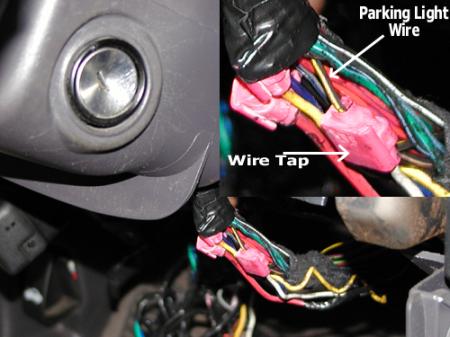
locations. You will need to attach the 12V+ wire to your parking light wire Others
have attached the 12V+ to different sources, but, I would not recommend it.
I am showing mine (black wire w/ yellow stripe), I cannot guarantee yours will
be the exact same. I installed my Controller inside the fuse box because once
it is set I don't think I'll ever change it. If I have too, all I have to do is
pop off the cover. The Controller does light up so keep that in mind when
picking a location. Also I used 2 sided foam tape to install the Controller
Box.
Now run the plugs for the gauges (on the Controller Box) up behind the dash and
out where your gauges sit.
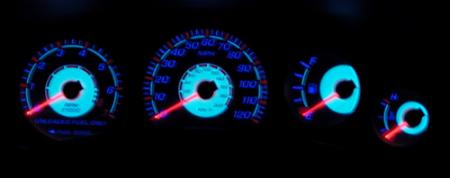
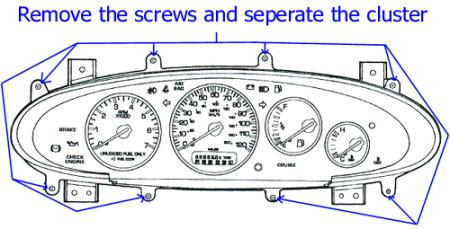
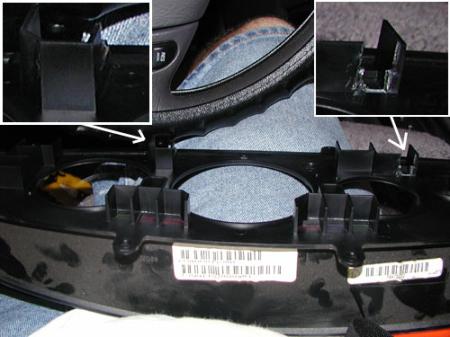
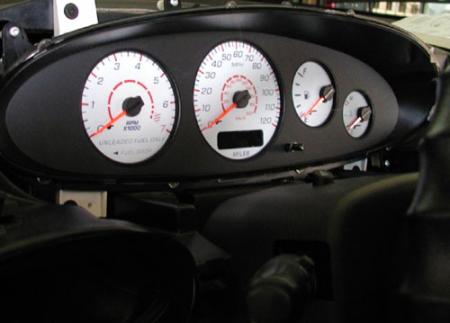
Now time to install your gauges. First seperate the gauge cover from the
cluster
by removing the 8 torx screws.
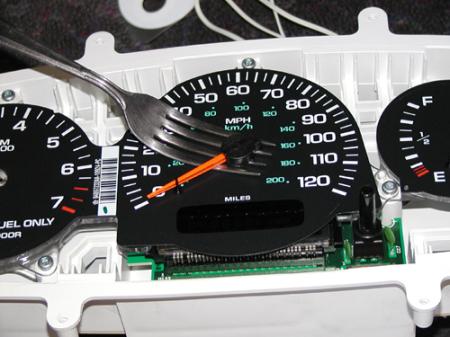
Remove needles using a special needle removal tool (fork)
First you will want to remove the bulbs from the back of the cluster that are
used for illumination (there are two total). I will post a pic of the exact
location of the 2 very soon. Now you will need to put on your new gauges. They
go right over your old ones so do not remove them. The holes do not line up
exactly so I used a little scotch tape to hold them in place. Just make sure
none of the tape will be visable once you put the cover back on. You will have
to route the gauge plugs through unused bulb locations to run them out the
back.

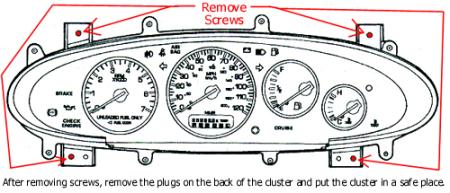
At this time you can install the cluster (4 screws) without the gauge cover.
Make sure to connect your gauge plugs to the plugs from the controller box at
this time as well as your other gauge plugs. Turn on your parking lights and
make sure everything lights up. Now it is time to put your needles back on.
Here is how you do it. Turn your key to the on position. Now put on all your
needles at the beginning position (fuel @ E, RPM @ 0, Speedo @ 0 & temp @
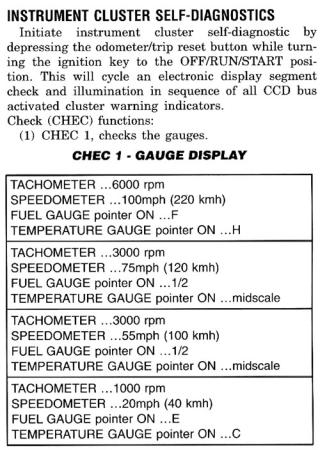
C). Now you should run the test mode to make sure they are all correct. I have
included the instructions from the Factory service manual to help. First
turn on the key while hoding in the Trip/Odometer button. This will put your
gauges in check mode. You might want to put it in check mode before you
start so you will be familliar with how it works. When you put it in
check mode each needles will stop at 4 locations as listed below in the pic.
Once all the needles are in place now you can put the gauge cover back on. You
will have to cut a couple of notches in the plasic first so it will slide over
the wires from the new gauges.
Then tighten the 8 torx screws that hold the cover to the cluster.
Now replace
all the other pieces and presto.